Accessing a Remote Database from a C# Application
Introduction
Purpose of the Exercise
In this exercise, we will build an application that can:
- Connect to a database stored on a remote SQL server,
- Retrieve data from a table, and
- Display the data in a grid on a form.
Throughout the semester, data movement between the client and the SQL server will be carried out in this manner.
Requirements
To complete this exercise, you need Visual Studio 2022 and the .NET 6 SDK or newer.
SQL Database Information
| Server | bit.uni-corvinus.hu |
| Username | hallgato |
| Password | Password123 |
| Database | Student |
Warning
The bit.uni-corvinus.hu SQL server is only accessible via VPN!
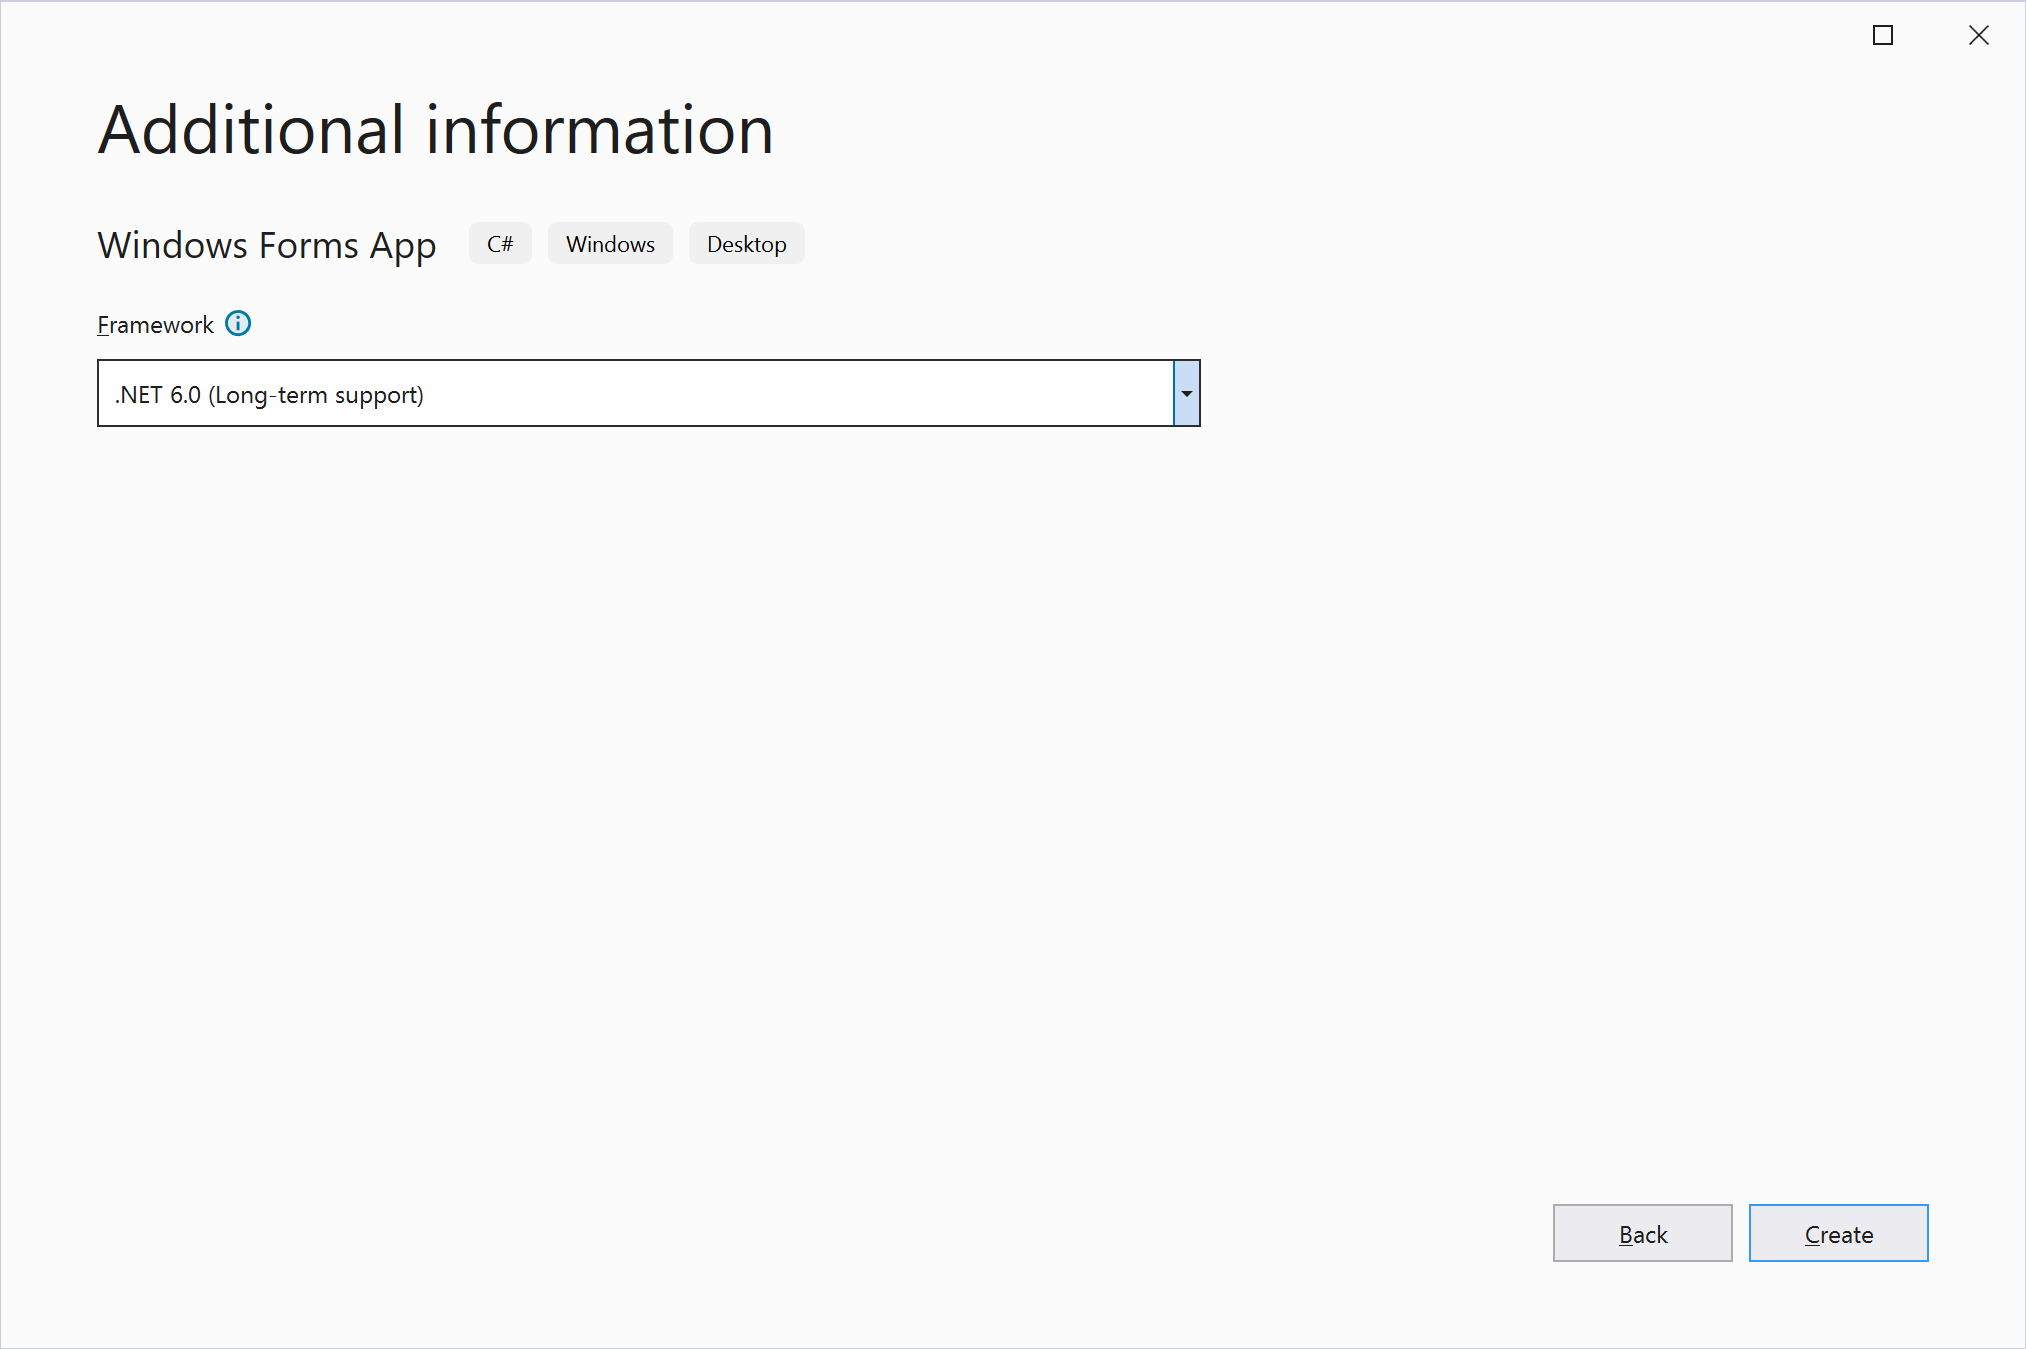
1. Creating a Windows Forms App in .NET 6
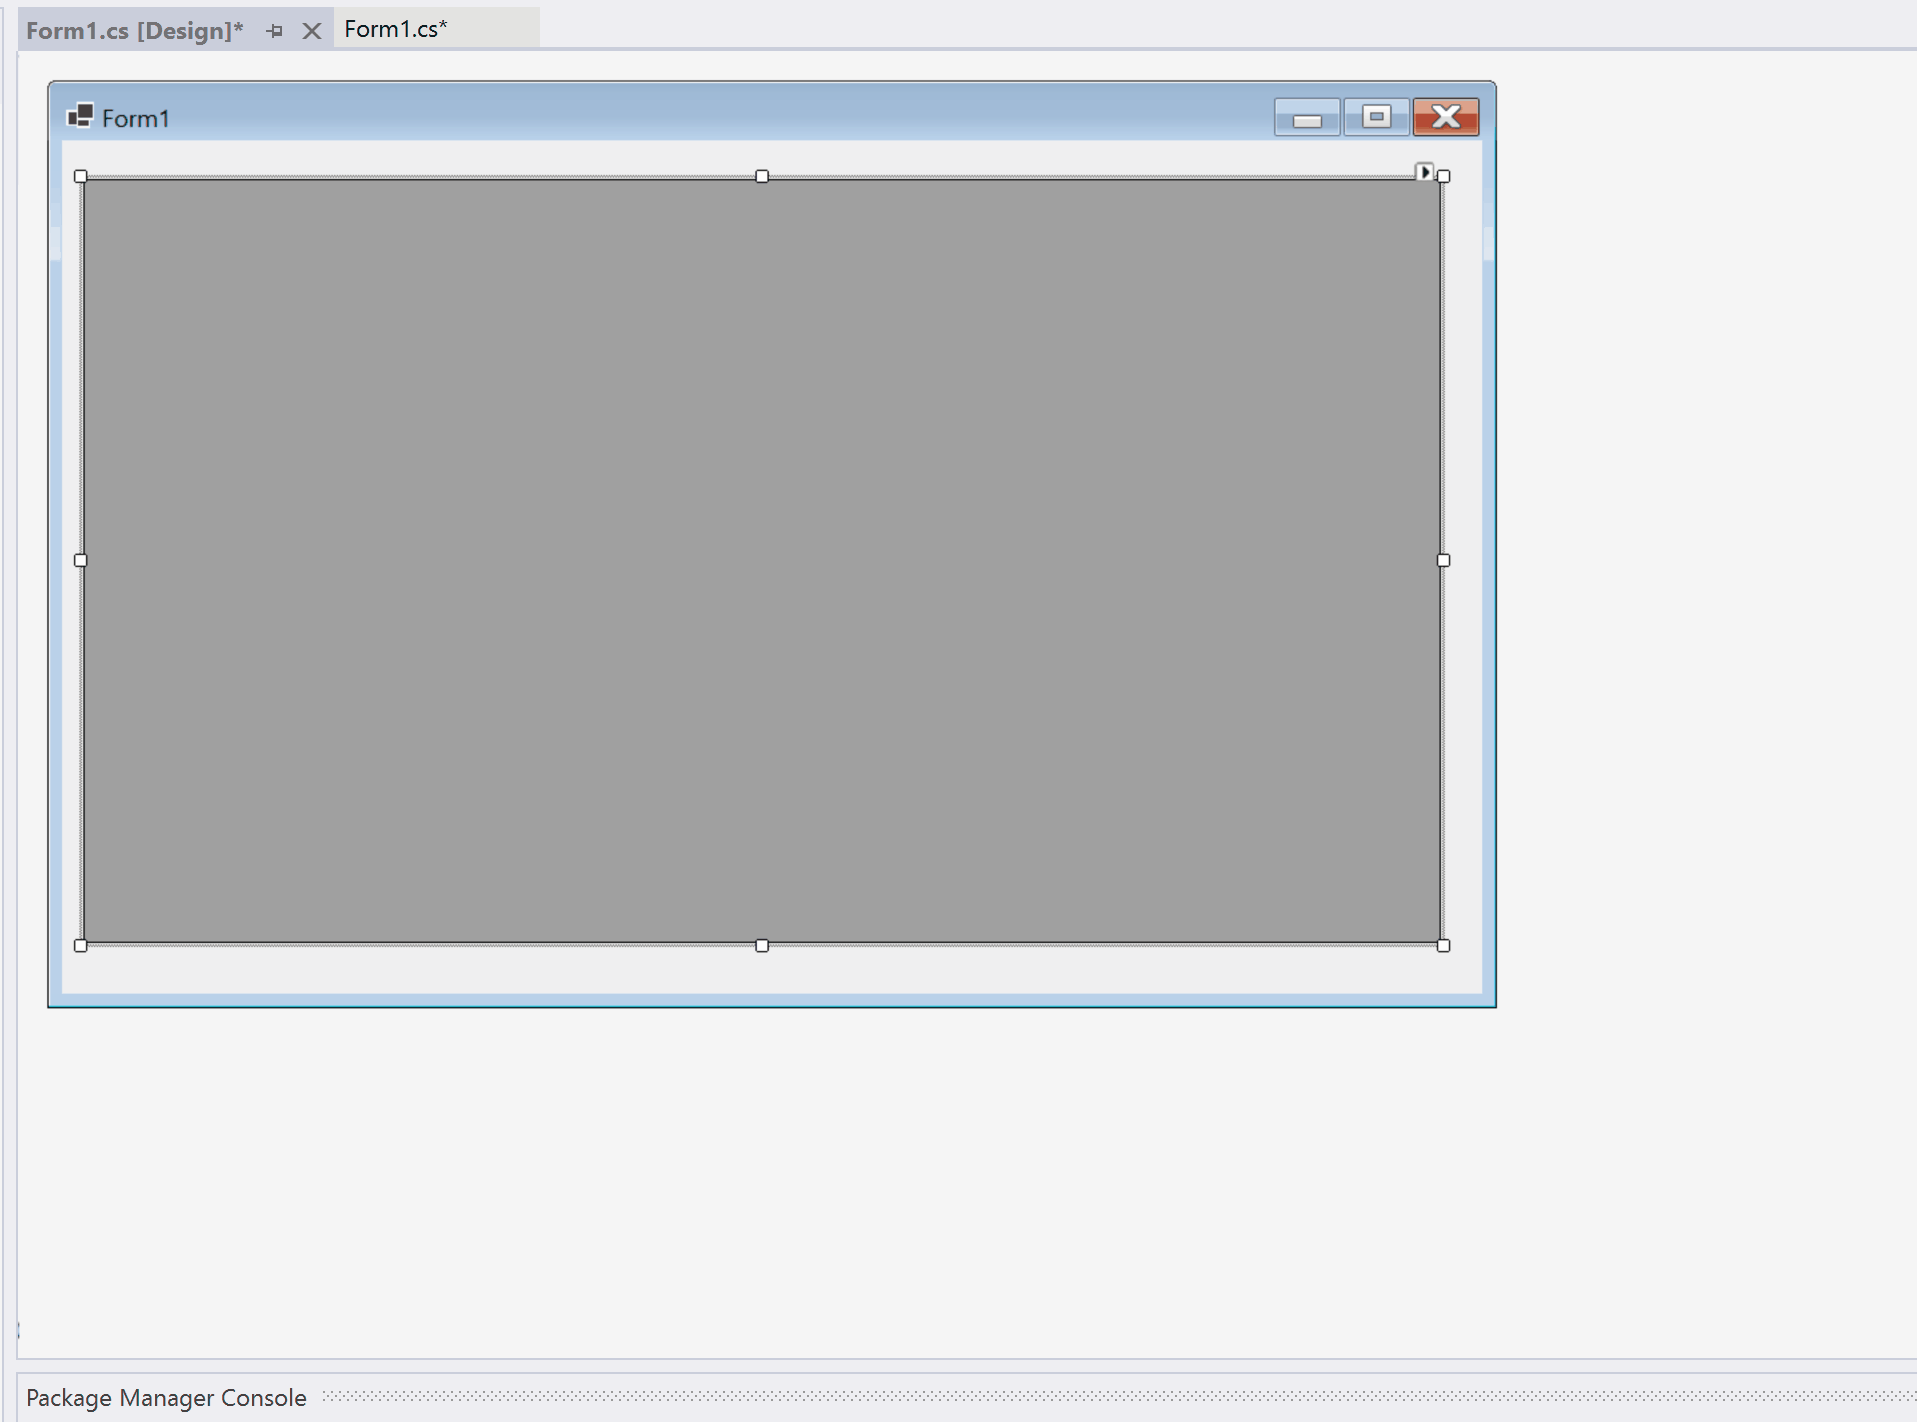
(+/-) Create a Windows Forms App project in Visual Studio. The Solution and Project names are optional; in this example, we use RemoteDbTest.
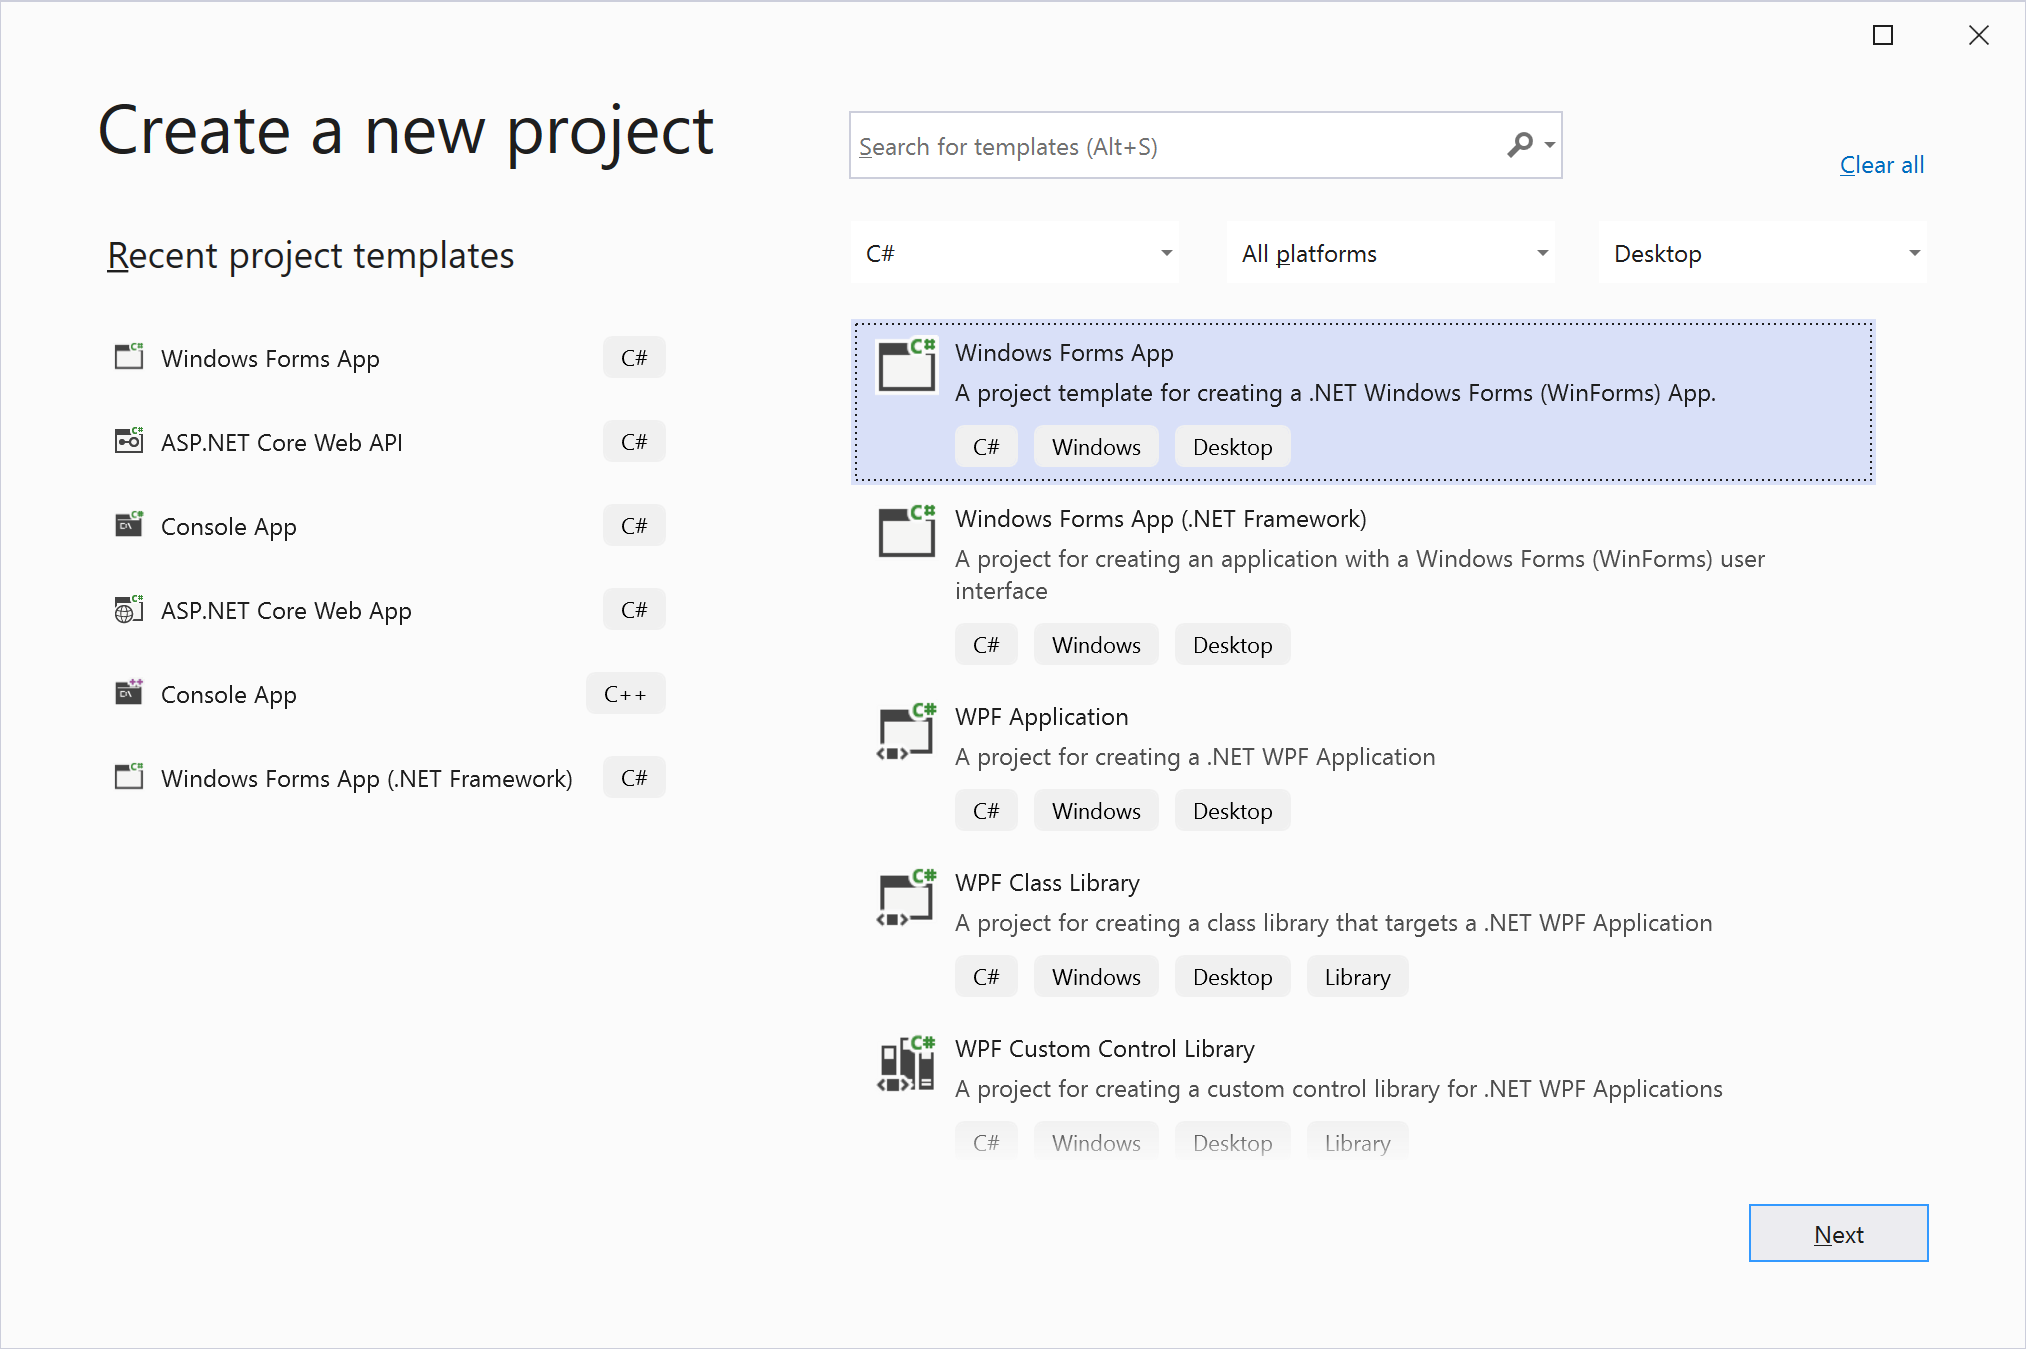
Warning
The Windows Forms App (.NET Framework) template uses the legacy .NET Framework (4.7 or 4.8), not .NET 6.0! Don't confuse them! In .NET 6, Windows Forms has been entirely rewritten, including the editor. A common mistake is accidentally creating a Visual Basic project instead of C#.
If done correctly, your screen should look like this:
2. Managing the Database in Server Explorer
2.1 Connecting to the Database in Server Explorer
Note
The Server Explorer is not related to the currently open project in any way. Visual Studio is an integrated development environment (IDE) that includes built-in tools for basic database operations. This allows developers to interact with databases without leaving VS or installing additional software.
(+/-) In Server Explorer, add a new database connection using the credentials provided earlier.
- If Server Explorer is not visible, open it using Ctrl+Alt+S or via the View → Server Explorer menu.
- Click the Connect To Database icon to create a new connection.
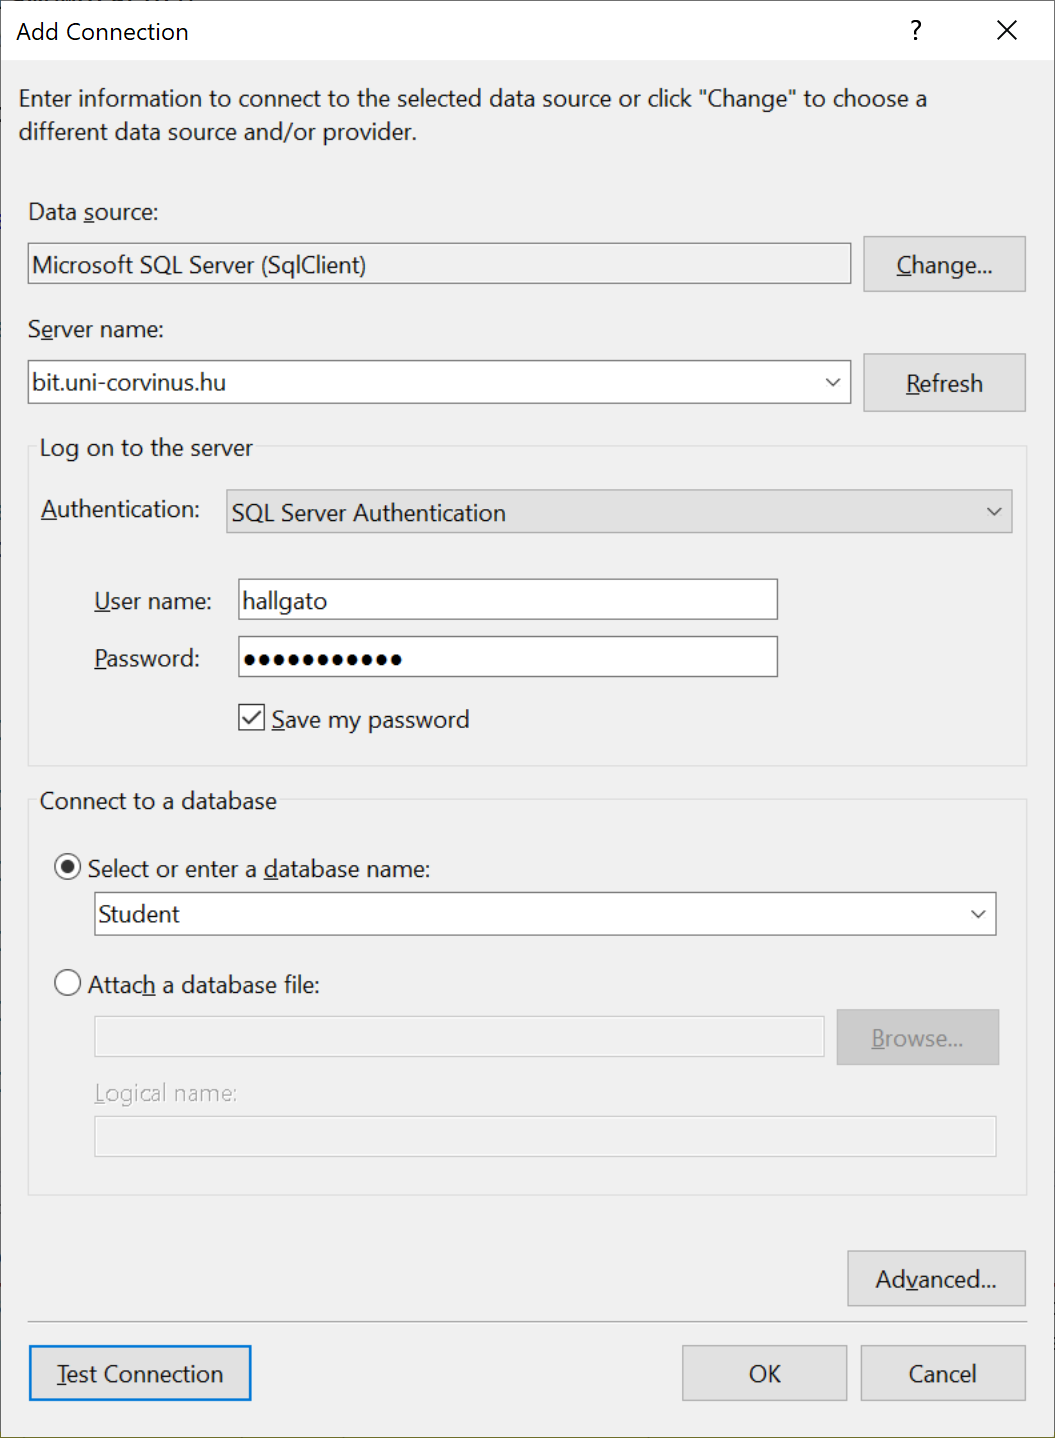
Fileds to fill in:
The server name is self-explanatory.
Windows Authentication means the client will use the Windows login credentials to authenticate against the SQL Server, which is useful for Active Directory integration. However, this is not the case here.
We use SQL Server Authentication, where authentication is done using a username/password stored on the SQL Server. The Windows Authentication method uses the same credentials for user authentication that the usrer used to log into Windows.
It's advisable to check the
Save passwordbox during development.The database name should be entered manually since it may not always be available in the dropdown.
If the
Test Connectionfails, check your VPN connection.
2.2 Extracting the Connection String
Since Server Explorer is not linked to the project in any way, we need the connection string to allow a C# program to connect to the remote database.
A connection string contains ; separated key-value pairs required for authentication and database access. We will use this connection string in the next step to generate the necessary C# classes for database access.
To find the connection string, click on the database in Server Explorer, and check the Properties window:
Data Source=bit.uni-corvinus.hu;Initial Catalog=Student;Persist Security Info=True;User ID=hallgato;Password=***********
(+/-) Remember where to find the connection string! You'll need it later. Or copy it to Notepad...
3. "Reverse Engineering" the Database
In Microsoft's terminology, Reverse Engineering refers to generating C# classes from an existing database schema. This allows us to model the database tables and relationships in C# code.
There are two main approaches:
- Database First: Generate C# classes from an existing SQL database schema.
- Code First: Write C# classes first, then generate the corresponding SQL schema.
This course follows the Database First approach.
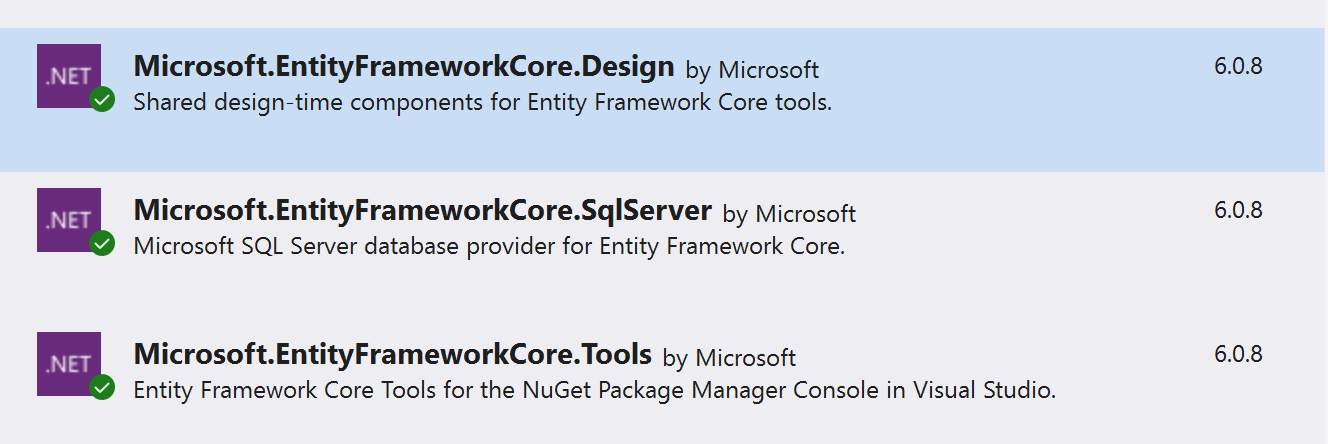
3.1 Adding NuGet Packages to the Project
(+/-) Open the NuGet Package Manager and install the following packages:
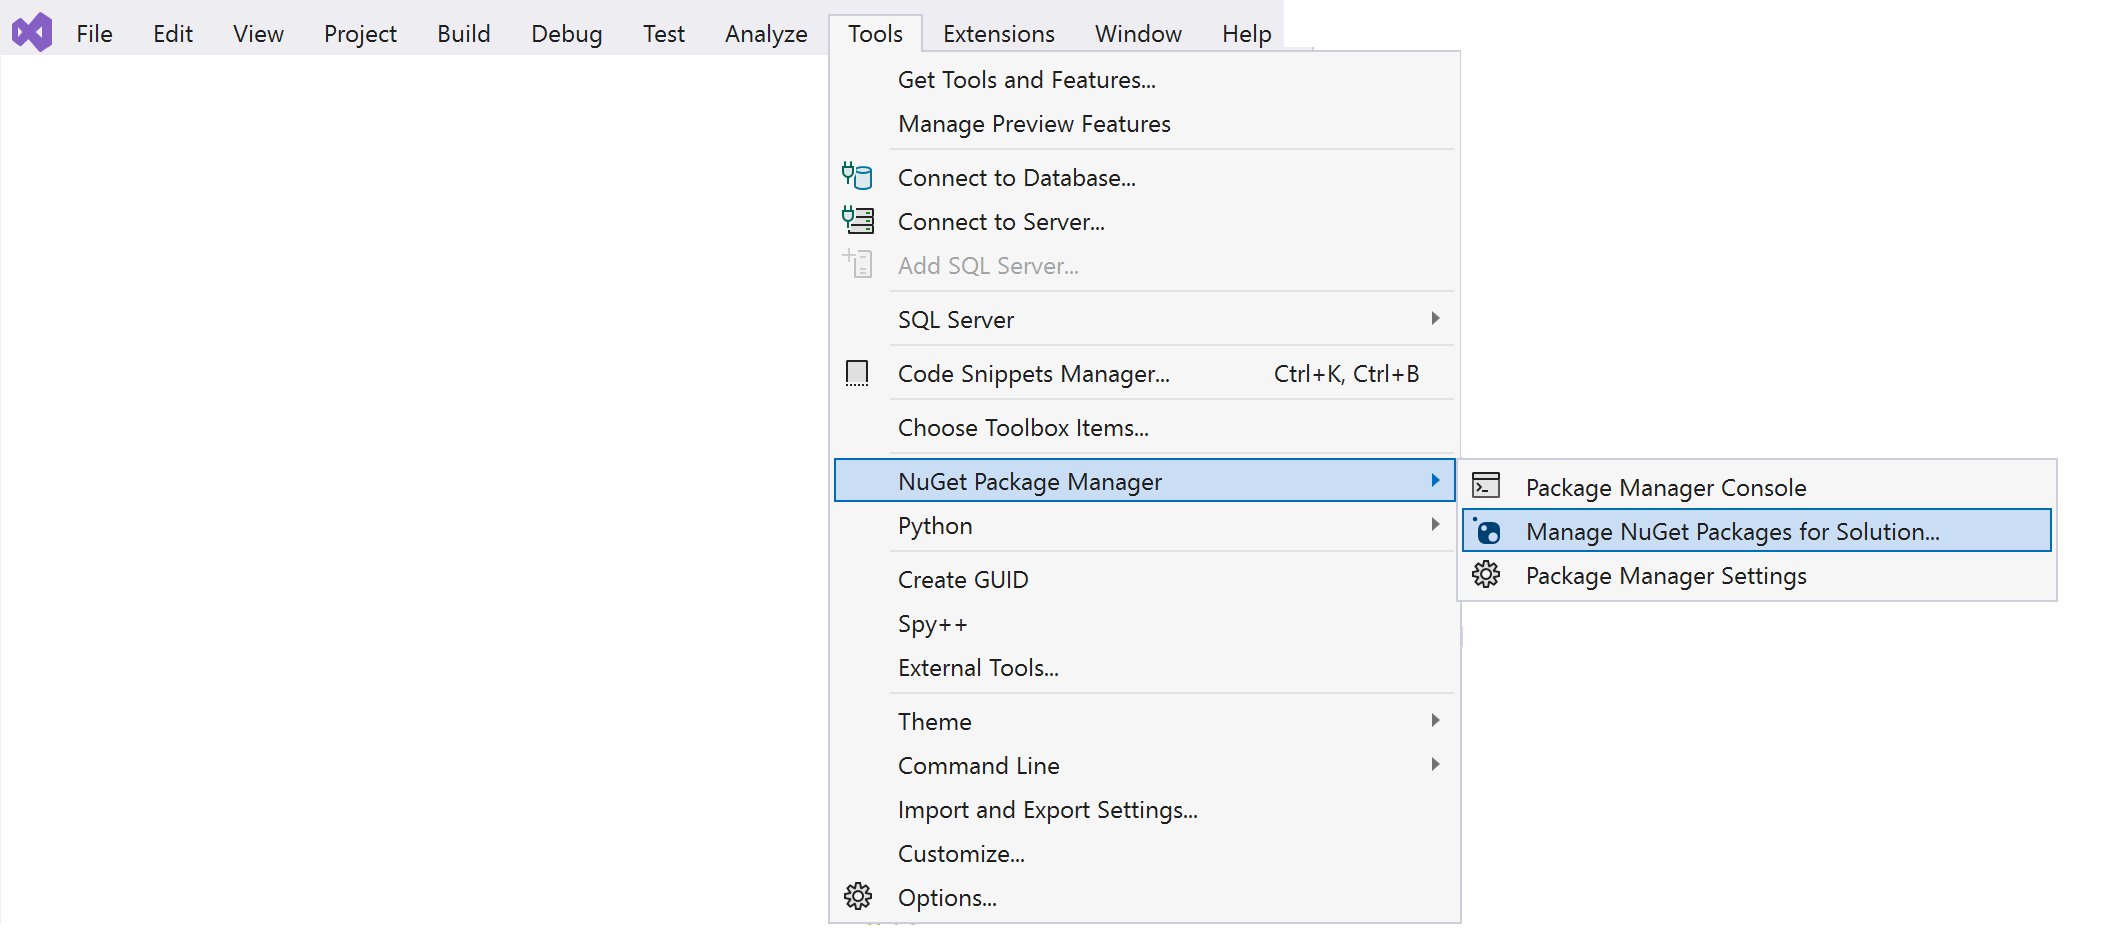
Alternatively, use these PowerShell commands:
Install-Package Microsoft.EntityFrameworkCore.SqlServer
Install-Package Microsoft.EntityFrameworkCore.Tools
3.2 Generating C# Classes
Unfortunately, .NET Core does not yet provide a built-in GUI tool for generating C# classes from a database schema. Instead, we use the Package Manager Console.
To generate the classes, use:
Scaffold-DbContext "[Connection String]" Microsoft.EntityFrameworkCore.SqlServer -OutputDir [folder]
For our example:
Scaffold-DbContext "Data Source=bit.uni-corvinus.hu;Initial Catalog=Student;Persist Security Info=True;User ID=hallgato;Password=Password123" Microsoft.EntityFrameworkCore.SqlServer -OutputDir Models
Warning
The password had to be entered again since for safety reasons it is replaced by * characters when copied to clipboard.
Warning
If Scaffold-DbContext fails to build the new classes, you might see the error "Build Failed." If this happens, try using the -Verbose flag for more details.
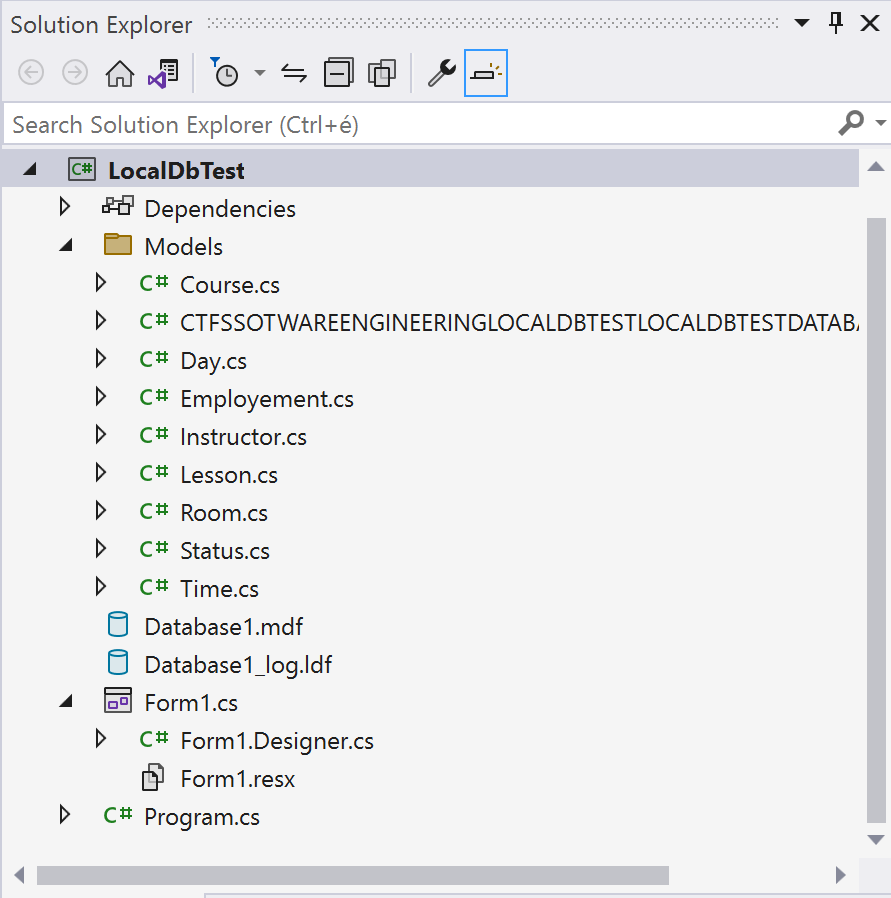
(+/-) Run the Scaffold-DbContext command with your connection string.
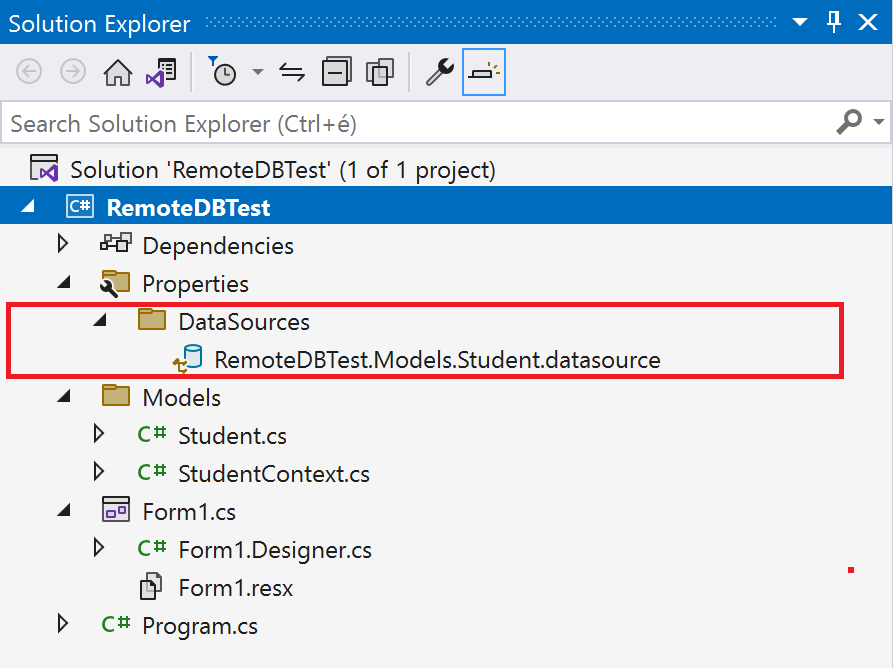
After running the command, a new Models folder appears in Solution Explorer, containing the generated files:
The Student Class
Check out Student.cs, which represents the Student table in the SQL database:
using System;
using System.Collections.Generic;

namespace RemoteDBTest.Models
{
    public partial class Student
    {
        public int Id { get; set; }
        public string Neptun { get; set; } = null!;
        public string Name { get; set; } = null!;
        public DateTime BirthDate { get; set; }
        public decimal? AverageGrade { get; set; }
        public bool IsActive { get; set; }
    }
}
The StudentContext Class
By default, the generated context class is named [DatabaseName] + Context.
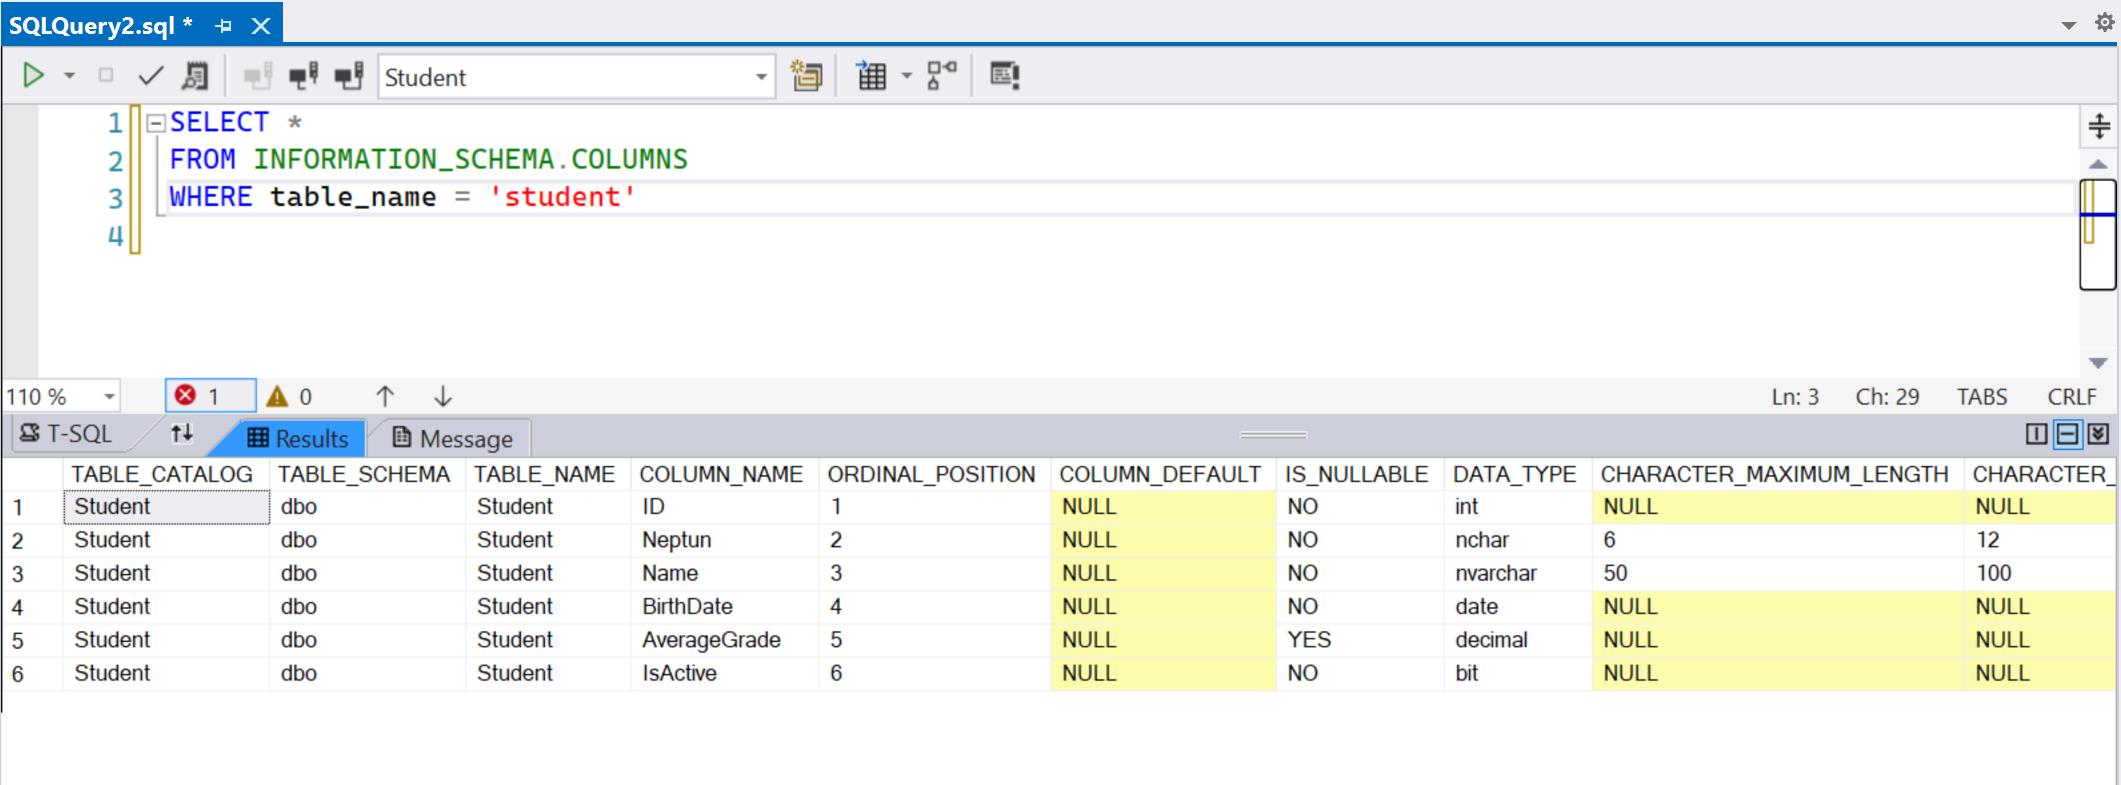
You can compare the properties of the Sudent class with the database schema:
4. Creating a Forms-Based UI
4.1 Creating a DataGridView
(+/-) Add a DataGridView named dataGridView1 to Form1.
(+/-) Set its Anchor properties so that it resizes with the window.
4.2 Retrieving Data from SQL Server
(+/-) Declare a StudentContext instance at the class level.
Remember: According to naming conventions, class names should start with an uppercase letter, while instance names should start with a lowercase letter.
We perform instantiation at the class level because we want to access
contextfrom multiple methods within the class.The name
contextappears in all Microsoft documentation and example programs, so we adhere to this convention—it could be anything.
namespace RemoteDBTest
{
    public partial class Form1 : Form
    {
        // Through the "studentContext" object, the remote database elements can be accessed.
        Models.StudentContext studentContext =  new Models.StudentContext();
        public Form1()
        {
            InitializeComponent();
        }
    }
}
Then use
namespace RemoteDBTest
{
    public partial class Form1 : Form
    {
        Models.StudentContext studentContext =  new Models.StudentContext();
        public Form1()
        {
            InitializeComponent();
            dataGridView1.DataSource = studentContext.Students.ToList();
        }
    }
}
Why is the table named Students instead of Student?
Entity Framework automatically pluralizes table names when generating context classes. You can disable this with the -NoPluralize flag in Scaffold-DbContext. The A Scaffold-DbContext docs. can be checked here.
4.3 Using Data-Bound Controls
(+/-) In the DataGridView properties panel, click the dropdown, then select Add Object Data Source.
(+/-) Select the Student class as the data source.
Now:
- A
BindingSourcenamedstudentBindingSourceis created. - The
studentBindingSourceis linked to theStudentclass. - The
DataGridViewusesstudentBindingSource, so it displays theStudentclass properties.
What happened?
- This sequence of steps created a
BindingSourcenamedstudentBindingSource, which appears under the form in the designer because it has no visual representation. - The
studentBindingSourcealready has theStudentclass set as its data source in the designer. - The
DataGridViewusesstudentBindingSourceas its data source. SincestudentBindingSource"knows" that it will display a list ofStudentobjects, the properties of theStudentclass appear in the grid. - In the Solution Explorer, an item named
DataSourceswas created, which contains theStudentclass registered as a data source. If something was added by mistake, it can be deleted from there.
(+/-) Bind data to studentBindingSource instead of dataGridView1:
Replace:
dataGridView1.DataSource = studentContext.Students.ToList();
With:
studentBindingSource.DataSource = studentContext.Students.ToList();
4.4 Saving Changes to the Database
(+/-) Add a Save button (saveButton).
(+/-) Handle its click event:
private void saveButton_Click(object sender, EventArgs e)
{
    studentContext.SaveChanges();
}
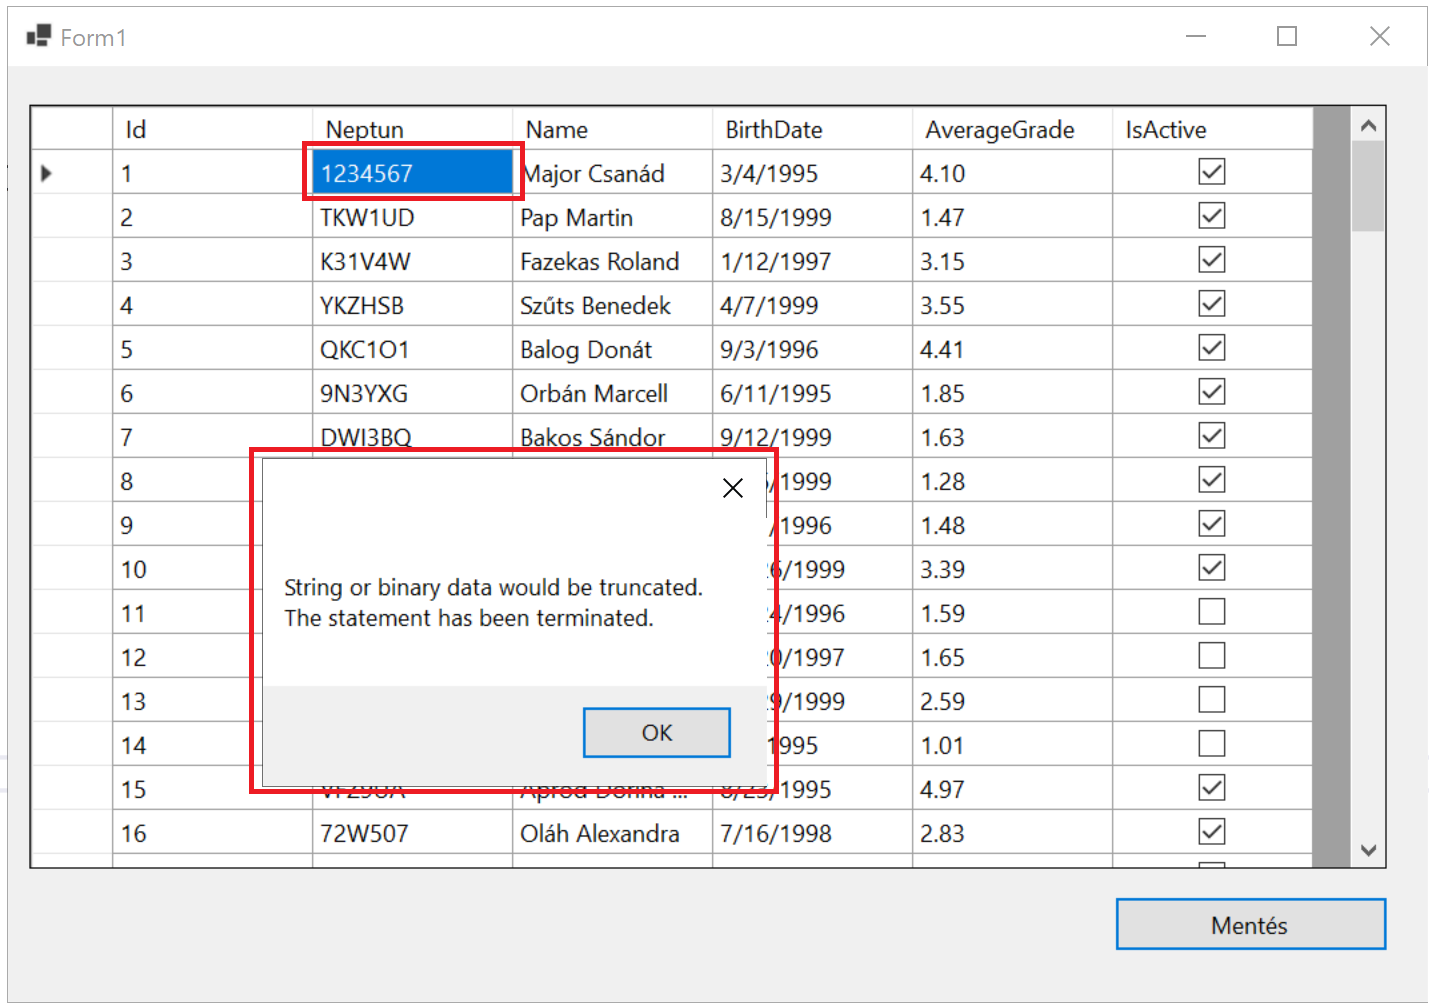
4.7 Exception Handling
Handle runtime exceptions:
private void saveButton_Click(object sender, EventArgs e)
{
    try
    {
        studentContext.SaveChanges();
    }
    catch (Exception ex)
    {
        MessageBox.Show(ex.InnerException.Message);
    }
}
Now, if an invalid input (e.g., a 7-digit Neptun code) is entered, users will receive an error message when studentContext.SaveChanges(); is invoked.